
With the generator cooling system disassembled to troubleshoot an electrical problem, now was as good a time as any to tackle some basic cooling system maintenance. Northern Lights recommends the cooling system be serviced every two years, regardless of hours. Mine was last serviced three years ago, and it was giving a few indications that it was time to do it again. At high loads, the temperature crept up a little higher than it used to. More concerning, the coolant seemed to be slightly diluted with seawater.
A little context on the cooling system. A raw water pump uses a nylon impeller to pump seawater into the engine, where it runs across one side of a seawater-to-coolant heat exchanger (a cylinder filled with tubes, on one side of the tubes is coolant, on the other is seawater). Once it runs through the heat exchanger, it’s injected into the exhaust elbow to cool the exhaust gasses and then dumped overboard. This is a common design on marine engines since clean coolant (cooled by seawater at the heat exchanger) rather than corrosive seawater is actually circulating through the internals of the engine. How, then, was seawater getting into the coolant?
Northern Lights uses rubber “boots” with hose clamps to isolate seawater and coolant. There’s a boot on both the intake and output side of the heat exchanger. The largest opening connects to the heat exchanger housing, keeping the coolant in the expansion tank. The next hose clamp is the most critical, since it holds the rubber boot onto the heat exchanger core and forms the only seal between coolant and seawater. The smallest hole, at a 90 degree angle to the others, is where seawater flows in from the raw water pump, and on the output side, where seawater is injected into the exhaust elbow.
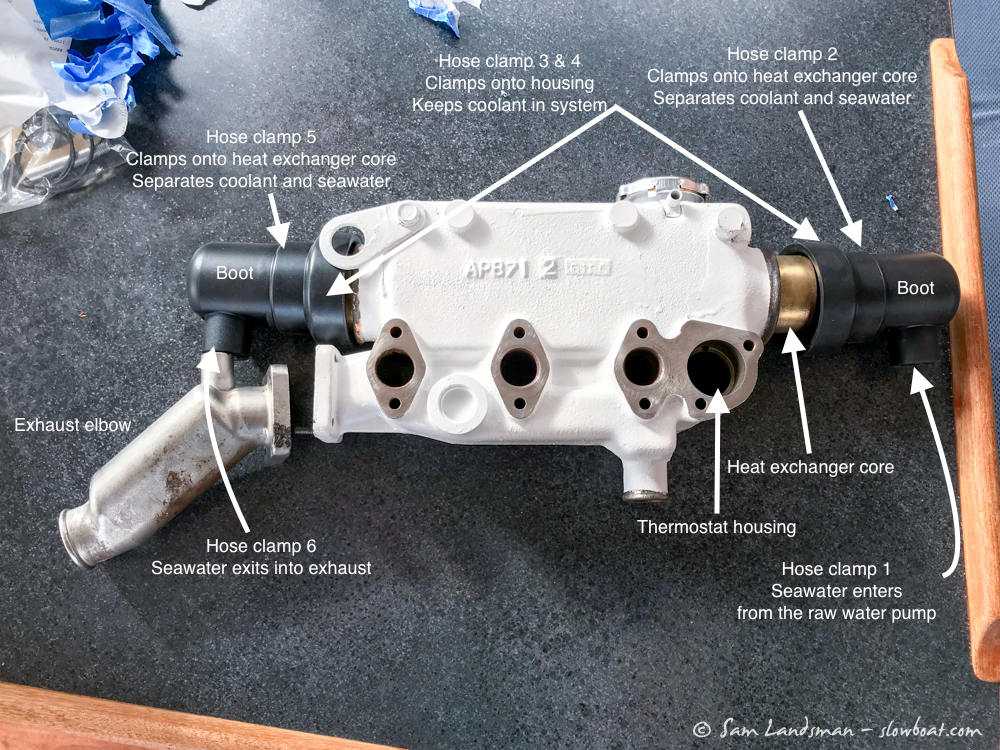
Over time, vibration, thermal cycles, and compression of the rubber boots causes these hose clamps to loosen(3 and 4 in above photo). The coolant-to-seawater seal becomes less effective and seawater that is pressurized by the raw water pump can contaminate the coolant. This can be accelerated by impeller vanes or other obstructions that clog the heat exchanger, effectively increasing the pressure of the incoming seawater and overwhelming the seal. I suspected the seawater contamination was caused by this, but I wanted to rule out a failed heat exchanger so I took it to Seattle Radiator Works for cleaning and pressure testing. It came back clean and with a clean bill of health. Ordinarily at this point I’d put it back in, install new boots, refill the coolant, and be good to go for a few more years.
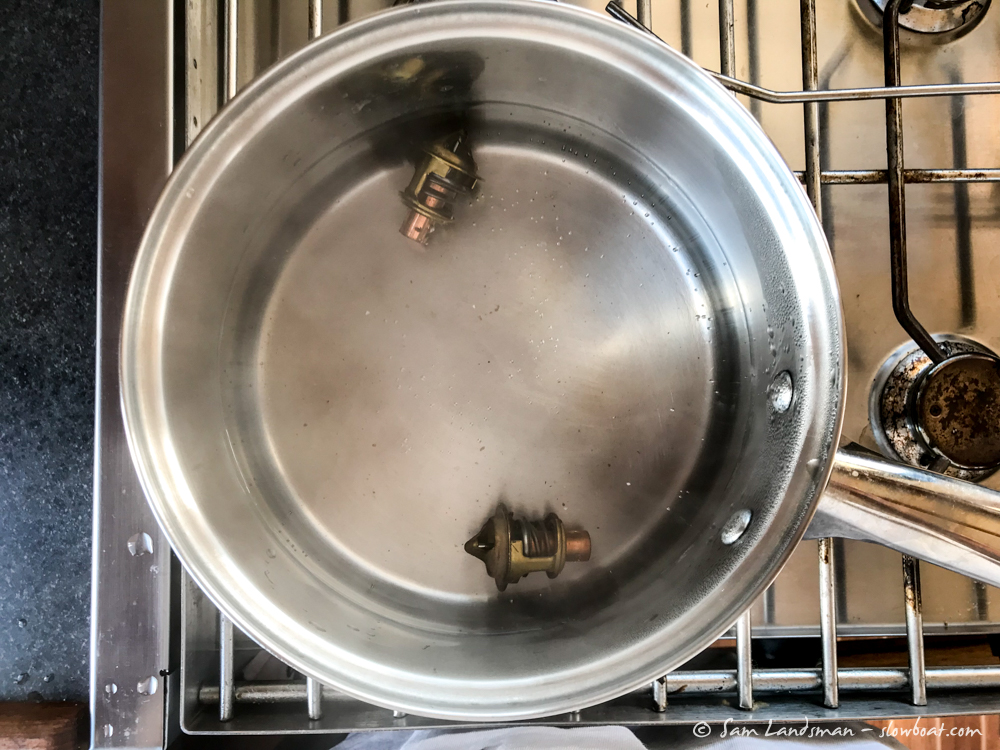
But while things were partially disassembled, I also wanted to replace the thermostat (which was working fine, but 18 years old). This requires removing the exhaust elbow, starter, and expansion tank/exhaust manifold.
Side note: Northern Lights ship with a cast iron exhaust elbow that inevitably fails, so this is a good time to replace it with the more robust (and equally priced) stainless steel version (make sure to remove the old gasket and install a new one, too).
Removing the expansion tank/exhaust manifold is straightforward, although the starter gets in the way. Rather than removing the entire starter, I was able to simply unbolt it and move it out of the way without disconnecting any wiring. Then I removed the five bolts and three nuts holding the expansion tank/exhaust manifold, whacked it a few times with a mallet to break it free, and pulled the whole assembly off the engine. Since there was some surface rust on the expansion tank and carbon buildup in the exhaust manifold, I opted to drop it off at Seattle Radiator Works for cleaning, pressure testing, and painting.
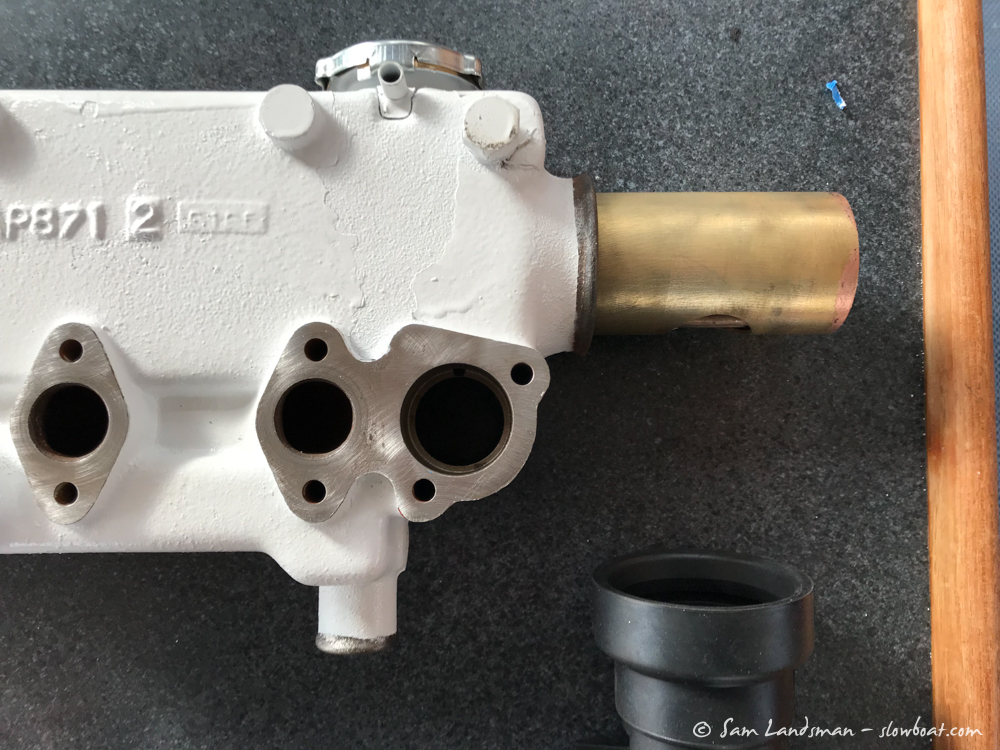
The next step was putting it all back together. The biggest challenge was getting the new boots to fit properly on the heat exchanger core. The heat exchanger core extends about an inch beyond the housing in each direction; this is where the boots clamp and form the seal between coolant and seawater, so positioning this perfectly is absolutely essential to avoiding seawater in the coolant. Further complicating things, the heat exchanger core must be oriented with the small bleed hole facing up, and the two larger holes facing down. Two things helped this process tremendously: “dry fitting” the core and marking with a sharpie where it should be, and using water to lubricate the boots to make fitting them easier.
Bob Senter, the ever-helpful Northern Lights guru, offered one more piece of advice: “There’s an assembly trick to making the boots seal the seawater out of the coolant: tighten the smaller hose clamp on the heat exchanger tube bundle first, then the bigger clamp on the manifold. If you do it in the reverse order, you’ll pinch the boot and create a seawater path.”
After reconnecting everything and tightening all the hose clamps and bolts, flushing the cooling system several times, and filling it with fresh coolant, I fired up the generator. Amazingly, it worked! Actually, it worked better than before. Even at 100% load, the temperature stays right where it should. Onto the next project…